30hz Laser Rangefinder Module
Features of STA-A90 Rangefinder Module
Eye safety
●905nm semiconductor laser, eye safe.
●High reliability and long service life.
Easy to operate and secondary development
●Equipped with UART (TTL_3.3V), RS485 (data conversion cable required) electrical interface (one of two).
●It is equipped with upper computer test software and instruction set communication protocol, which is convenient for users to carry out secondary development.
30Hz high frequency measurement, high precision
●Resolution 0.1m.
●Ranging accuracy ≤1m. High precision leads to more accurate ranging results.
●Weight ≤36.5g. Small size, light weight.
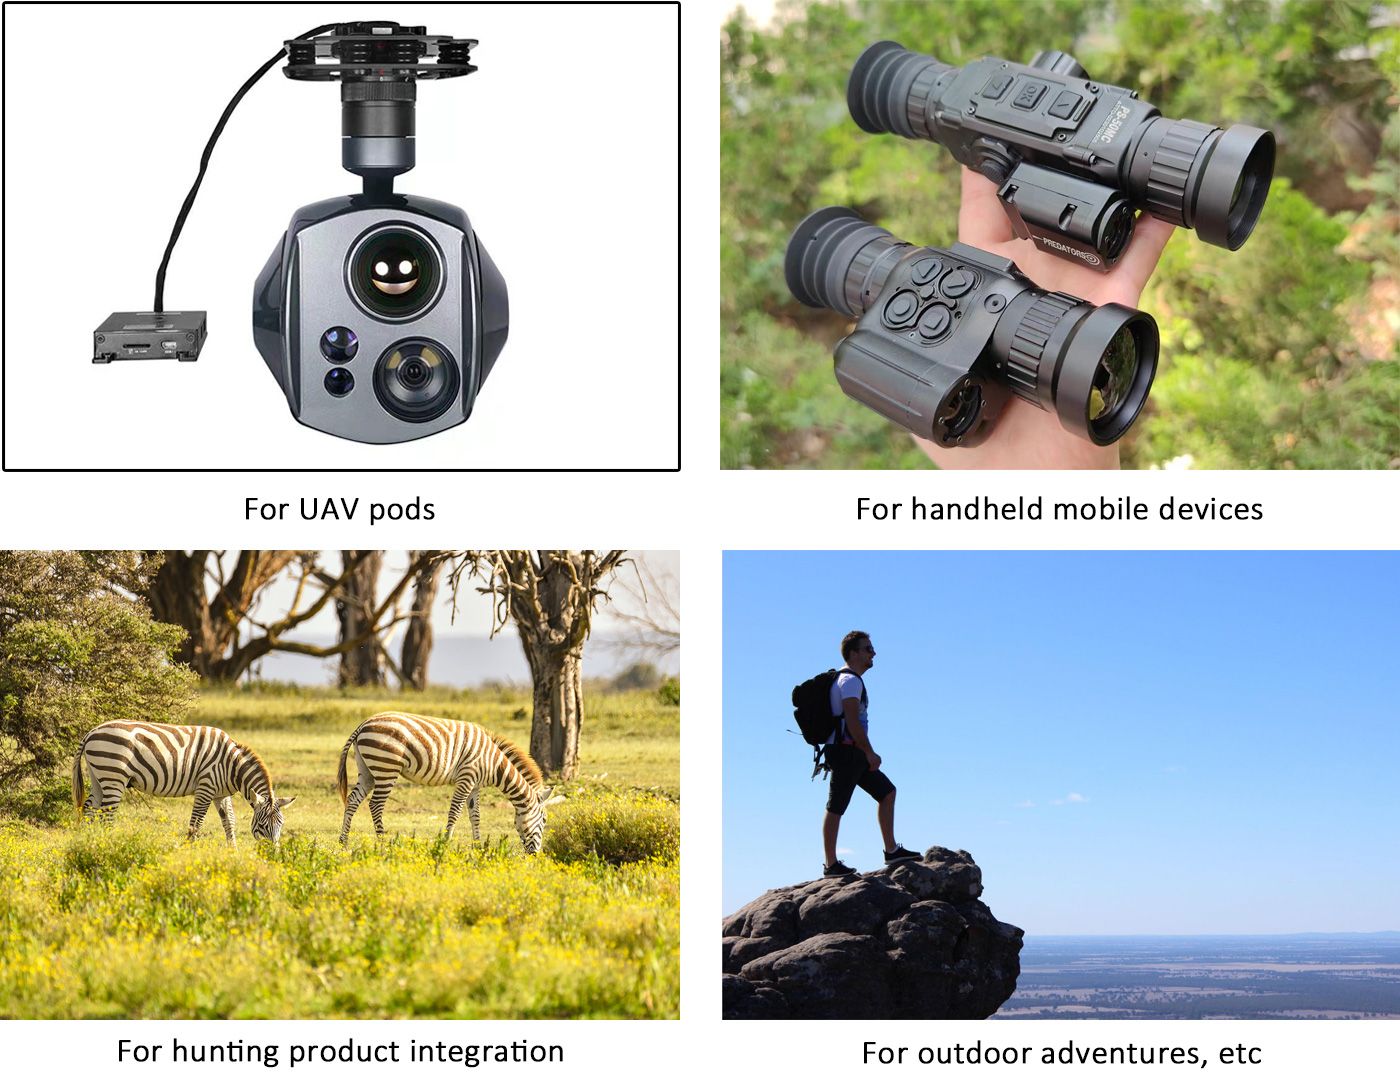
Applications of STA-A90 Rangefinder Module
Module parameters
|
Model |
STA-A90 |
|
Range range |
10-270m |
|
Ranging accuracy |
±5cm@5m, ±5cm@20m以上 |
|
Distance measurement frequency |
30Hz |
|
Resolution ratio |
±0.1m |
|
Laser wave length |
905nm (eye-safe, Class 1 safe laser) |
|
Laser divergence Angle |
3mard |
|
Working temperature |
-20℃~+60℃ |
|
Product weight |
36.5g |
|
Product size |
49.5*42*26mm |
|
Communication mode |
TTL or 485 (optional) |
|
Service voltage |
3-5V |
|
Baud rate |
38400/19200/14400/9600bps (optional, default is 9600) |
|
Interface connector specification |
SH1.0 terminal 6Pin connector SMT mount or row pin available |
Interface connector specification
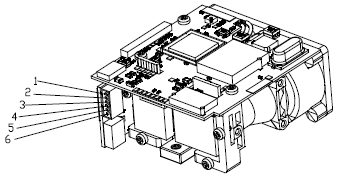
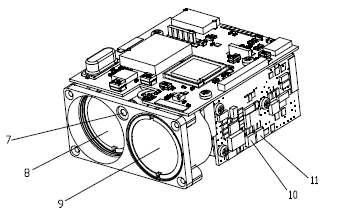


Terminal interface definition: Pin interface definition:
|
1 |
SW(NC) |
7 |
Indicating laser hole |
13 |
TX |
|
2 |
B(485)Communication |
8 |
Laser reception |
14 |
RX |
|
3 |
A(485)Communication |
9 |
Laser emission |
15 |
USB(+5V) |
|
4 |
NC |
10 |
Positive battery terminal |
|
|
|
5 |
VCC(3-5V) |
11 |
Negative battery terminal |
|
|
|
6 |
GND |
12 |
GND(Ground connection) |
|
|
Product size
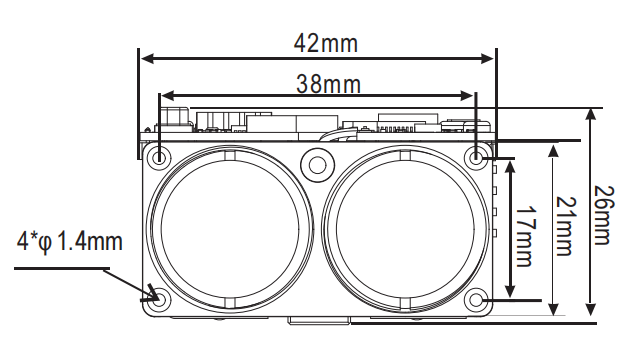
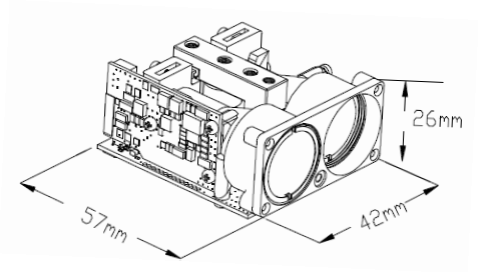
Location and dimensions of front nut holes
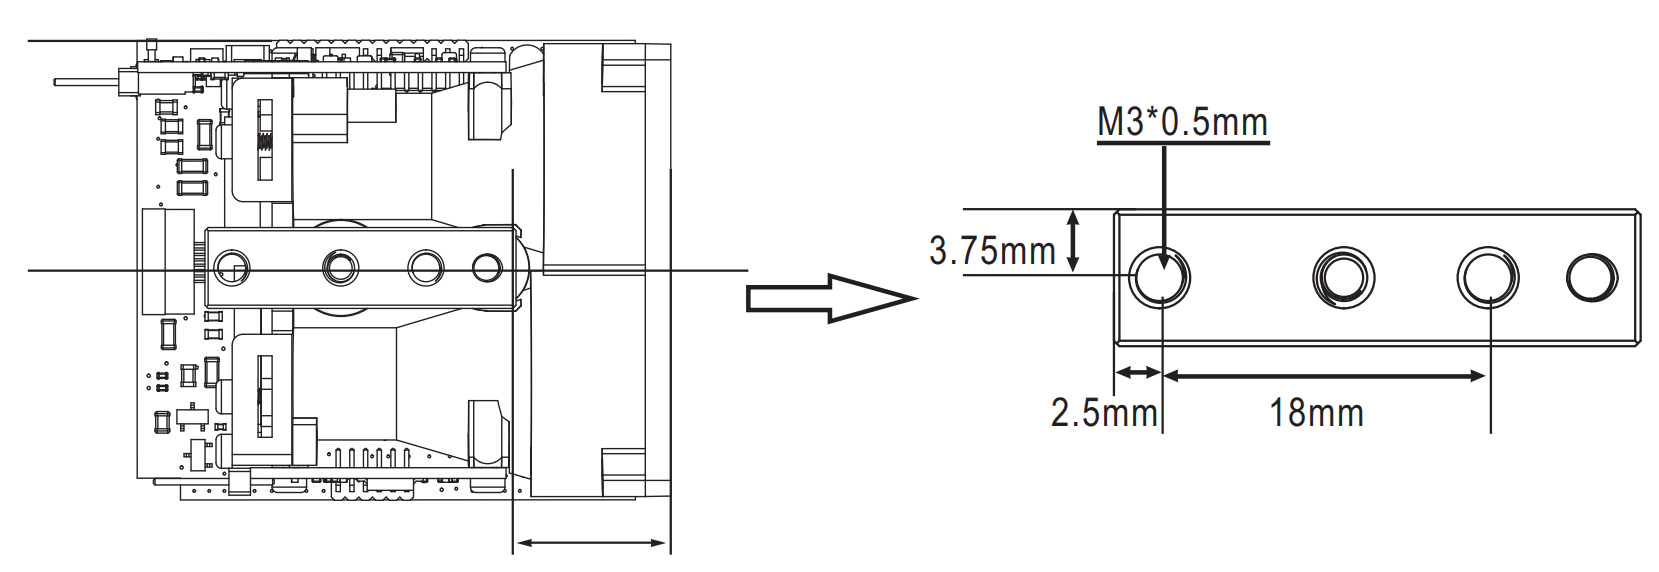
Nut hole positioning and specification
Operation procedure
Step 1: Connect the ranging module with data cable to supply power to the module and output measurement data; (Note: no plug and strictly control the supply voltage range at 5V); or supply power via CR2 (3V) battery;
Step 2: Install the serial port elf software and connect to a computer or other control device via the connection port.
Step 3: After the software is installed, open the display interface.
Commissioning and testing
Select COM port: Set the corresponding COM port in the software based on the computer's COM port.
Baud rate setting: Open the software interface to set the baud rate, with options of 38400/1920/14400/9600bps (default is 9600).


